Saturday, March 4, 2017

Battle of Buçaco after action report

We gamed the Battle of Buçaco last night.  We finished 8 of 14 turns.  (We called it a night after the 1pm turn.)  The Anglo-Portuguese were ahead on points when we stopped, but the players felt like this would have swung in the French favor had we kept playing, and finished the last six turns.


Initial deployments:

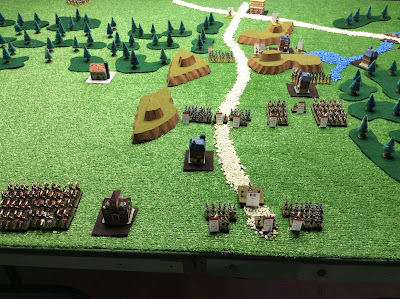
French side looking to the southwest.  The ridges with the British and Portuguese deployed in "reverse slope" are in the distance.

French side looking northwest.

The French artillery reserve near a primary west-to-east road.

The French VIII Corps under Junot.  They would not see action in this battle. 

Extreme north (left) of the British line.  Cole's 4th Division.

British center.  Craufurd's Light Division is in the background on the reverse slope of the ridge (yellow tags). Four independent Portuguese brigades and three independent batteries are in the foreground.  


British center-right.  Spencer's 1st Division. 

British right.  Picton's 3rd Division. 
British right.  Leith's 5th Division.  Or at least this is where early recon thought they were!  As the battle started, Leith's division was actually on the left side of the British line.


British extreme right.  Hill's 2nd Division. 
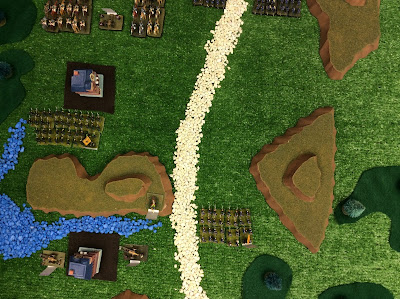
Looking south to north along the ridge line.


Looking north to south along the ridge line.

The French were led by Brad and John.  Brad played Masséna, and also Ney's VI Corps.  John played Reynier's II Corps and Montbrun's Reserve Cavalry Corps.  Junot's VIII Corps saw little action, but some of the individual brigades were ordered towards the front.

The Anglo-Portuguese were led by Johnny Warmonger, Cheatin' Bob, and the Hammer.  The Hammer anchored the British left, and both inflicted and received the most casualties.  This is where the main force of the French attack fell.  Johnny Warmonger played Wellington and the British center.  And Cheatin' Bob played the British right, which was a relatively quite sector.

The French led their attack with Ney's VI Corps assaulting the British left flank.  This was a hard-fought sector with both sides taking heavy casualties, but with the outright destruction of only a single unit (a French infantry brigade), not counting artillery batteries.

In the center the French pushed forward with Reynier's II Corps, grinding down the British in the hopes of pushing some of the French cavalry through the gaps in the ridge.  (The French had a massive edge in cavalry, but were not able to use it in the battle since the Allies tended to stay on the safety of the rough-terrain ridge.)

Final positions:

At their new extreme right the British plug a gap in the ridge line with an Infantry brigade.  The rest of the right prepares for a possible assault by the French cavalry. 
The French have seized the ridge on the right, and have nearly captured the one on the left too.  A sole British infantry brigade contests that ridge.


The extreme British left.  The ridge on the right is contested.  The ridge on the left had been the scene of much hard fighting, but both sides have been so bloodied that no one dares to climb it now. 
The French right.  Ney has lost a good portion of his artillery, and many of his units to the near side of the road are pretty beat-up.  He is still strong in the center of this scene, and some of Junot's VIII Corps is starting to arrive.


The French left.  Montbrun's cavalry is ready to race through one of the gaps in the ridge line.  Reynier's light infantry have seized the ridge to the right.  Three batteries of the reserve artillery screen the cavalry reserve.

Points at the end of play (end of turn 8 of 14):

The French held 75 points for objectives (three villages), and scored 58 points for casualties, for a total of 133 points.

The Anglo-Portuguese held 150 points for objectives (five villages and the convent), and scored 78 points for casualties, for a total of 228 points.

The Anglo-Portuguese side believed, and this was likely, that had we continued play, the points for objectives would have shifted in favor of the French, AND the French would have also fed in fresh troops.  The fresh troops would have likely routed or destroyed more of the Anglo-Portuguese formations than they would have lost, further moving the needle in favor of the French.

Casualties:

Portuguese:  7,600 infantry, 0 cavalry, and 2 batteries.

British: 8,000 infantry, 180 cavalry, and 4 batteries.

British-Portuguese total: 15,600 infantry, 180 cavalry, 6 batteries.

French: 12,400 infantry, 180 cavalry, 4 batteries.

Monday Morning Analysis:

The French attacked en masse all along the line, making the most of their two powerful corps under Ney and Reynier.  This was a much better plan and showing than historical.  The French had very hot dice, destroying a significant amount of the Allied artillery in just the first few turns.

The Allies made the most of their terrain, keeping the cavalry out of the game.  They were also able to counter-punch in select places to inflict timely losses on batteries and isolated brigades.  They may have needed to accept more risk - maybe too much - to shift more troops to their left and left-center to achieve local superiority in firepower.  The Allied luck also ran hot and cold, alternating between highly effective rolls that would wipe out an entire brigade, but punctuated with long periods of totally ineffective firing and combat.

With such uneven luck, chance favored the big battalions, and a probably French victory.

Here is a link to a Google Sheet with the OOB and a turn record chart.

Friday, July 8, 2016

Battle of Talavera - session report

We played the Battle of Talavera on Friday, July 1, 2016.  It was an evenly matched battle:  neither side thought they had any chance of victory!

The battle opened with both sides shifting troops, especially cavalry, to the west.

French and British opening moves.
The French started to shift Victor's I Corps and the 1st Dragoon Division to the west to cross the brook.  The British countered by shifting their cavalry division to the west (British left) as well so they'd be able to hit the French forces as they crossed the brook.

French opening moves on their left.
On their left the French shifted IV Corps to engage both the Spanish fieldworks and the British infantry divisions holding the banks of the brook.  The IV Corps is not a strong formation, and assaulting both the Spanish and the British would be the undoing of IV Corps later in the battle.

The 2nd Dragoon Division shifts toward the middle of the battlefield.

The Spanish cavalry shifts west.
In reaction to the move of the 2nd Dragoon Division and the French massing in the west the Spanish cavalry brigades race to the west as the well.

Spanish moves on the Allied left.
Half of the Spanish Vanguard Division starts shifting to the center of the battlefield, and a Spanish brigade advances out of the fieldworks.  The Spanish are thinking they can turn the French flank and pressure the French to respond.  The Spanish commander -- who has a poor command radius and many units to command - moves near the fieldworks so that additional Spanish brigades may advance from the fieldworks.  There are also a pair of 12-pound batteries in the fieldworks that need to be moved more toward the center of the battlefield.

After a series of sharp skirmishes on the west side of the battlefield the British cavalry division is very worn down, and the French have made it across the brook, but are bloodied.  The French then press en masse across the brook with the bulk of the I Corps.

Positions in mid-morning.
The battle ends just past mid-day after a massive cavalry battle between the British cavalry division and the 1st Dragoon division.  The French cavalry are nearly destroyed, and while the British are worn, they hold the field.  The French I Corps assaults the Cerro de Medellin, but fails, beaten back by a combination of Spanish cavalry and the British 1st Division.

At this point the time is 1:00pm and the Madrid Garrison has arrived on the battlefield.  However, the cream of the French army has been lost, and the French decide to withdraw.

For his success Arthur Wellesley is made the Duke of Wellington.

Wednesday, July 6, 2016

Battle of Talavera - initial deployments

Below, a view looking west from over Talavera.  The Tagus River is in the foreground, and occupies one small corner of the battlefield.  A bridge goes over the river, leading east.  The Portina Brook empties into the Tagus, running west to east across most of the battlefield.  The Spanish army is in the foreground on both sides of the brook; the British are to the top left of the photo; and, the French are to the top right.


Below, the Spanish army positions at the start of the battle.  The Vanguard division is in the top right.  Three infantry divisions are in fieldworks north of the brook (on the French side of the stream).  Two more infantry divisions are behind them, south of the brook.  Two cavalry divisions sit south of the infantry.  It is a large force, but the troops are poor quality, and there is only a single Commander (in game terms) to control this unwieldy force.


Below, British positions at the start of the battle.  Three divisions hold the center of the field, two just south of the brook.  Wellesley is near the road so that he can maximize the use of the 2-for-1 road bonus when measuring command radius.


Below, British positions at the start of the battle.  Hill's division occupies the Cerro de Medellin, which will be a key fixture in the battle to come.  Payne's cavalry division lies south of the Cerro de Medellin.  This is the extreme left (west) of the Allied line of battle.


Below, French positions.  On the extreme French left (east) sits Milhaud's dragoon division.  The ground does not favor them with woods, orchards, the town of Talavera, and the fieldworks in front of them.


Below, French positions.  Just to the right of Milhaud is Sebastiani's IV Corps.  This is a relatively small corps, and contains only a single French infantry division.  The brigades are large, but one is green.  A small cavalry unit, and some German and Polish infantry round out the corps.  The French Leader (Jospeh/Jourdan) is right-center.  There is no road in this part of the battlefield to help facilitate command.


Below, French positions.  At the extreme French right is an additional dragoon division along with Victor's I Corps.  Victor's Corps is the fist of the French army and contains the best and largest divisions.


Not shown on the map are the Madrid Garrison.  They lie north of the battlefield and may enter play sometime mid-day.

Monday, July 4, 2016

Battle of Talavera - prelude

Rather than using the Napoleon's Battles scenario booklet for the order of battle and map, I used a handful of different resources.

The main order of battle came from Wikipedia.

I used a couple of sources for the map.  One is this interesting blog from Rafeal Pardo.  And another was this page from the British Battles web site.

I used an article from Wargames Illustrated, March 2005 (Number 210) to guide the level of experience for each of the brigades and batteries.


The final result became the order of battle I used.  You can find a Google Sheet with ready-to-use labels here.  A sample from the OOB is off to the left:  These are the labels for the British First Infantry Division under Sherbrooke.  It consists of three Units of Infantry, a Commander, and a battery of six-pound foot artillery.

Saturday, July 2, 2016

Version 0.5 of the rules released!

The setting for the version 0.5 update of the rules was Talavera.  This version has a slight updated to combat resolution which makes outcomes more "push" rather than "destroy."  In brief, whoever scores the lower number of HITS in a combat is considered the loser, and both sides lose that number of stands.  (There is always a one-stand minimum loss, unless both players fail to score a single HIT.) The difference between the number of HITS is used to calculate a retreat distance.  Each difference creates 6" of retreat.

For example, if I score two HITS and my opponent scores five HITS, we'll each lose two stands (the lower of the two numbers), and as the player who scored fewer hits, I will have lost the combat.  The different in the number of HITS is three (five minus two), and so I will retreat 18" away from the enemy (3 x 6").

If a player is forced to retreat through other Units, they receive a Fatigue marker.  If a Unit is forced to retreat through impassable terrain or off of the table, it is eliminated.

You can find a link to this latest version of the rules at the Rules page.  Link is at the bottom of the blog, or you can find them here.

Saturday, November 14, 2015

Battle of Quatre Bras after action report

We used the v0.4 version of the rules which makes close combat a bit more deadly.  There is less opportunity to retreat as a combat result, but it may be a little too deadly now.  Maybe a bit more tuning.

Dave and Brad played the French and drove hard up the main north-to-south road toward Quatres Bras.  The Guard Light Cavalry division led the way, clearing out most of the 2nd Netherland Division led by Perponcher.  This unfortunate division was entirely destroyed, nearly all by the GLC. The GLC finally burned itself out just east of Quatre Bras.  It has accumulated 7 fatigue markers, and the Iron Duke was able to disperse the unit with a well-timed king of clubs card.

However, by this point the Brunswickers had invested the crossroads and were fighting hand-to-hand with Kellerman's heavy cavalry.  Picton's division was keeping one of Reille's divisions pinned, and it looked like it would be a near-run thing.

The climax of the battle took place at 7pm when Reille got a little too close to the front lines, and a stray artillery shell left him wounded and dazed.  With the loss of his I Corps commander, Ney was too overburdened to control his army, and the French attack stalled, and then withered.  The French fell back from the crossroads just as two fresh British divisions arrived to secure the critical position.

The British - played by Marc and Cheatin' Bob - successfully traded space and troops for time, and were able to stop the French.

Sunday, November 8, 2015

Battle of Quatre Bras

This weekend we'll be fighting the Battle of Quatre Bras.  The French, led by Marshall Ney, attack with Reille's II Corps and Kellerman's IIIC Corps.  Opposing them are a mix of forces from Britain, Hanover, Nassau, Brunswick, and the Netherlands led by the Prince of Orange and Wellington.

The view from the south of Quatre Bras looking north.  The cavalry of the II Corps is in the front to the right.  One of the divisions of the II Corps is next to it, and another is back with Ney. 
French far left.  The Guard Light Cavalry appears, but the terrain around Quatre Bras is heavily wooded.  How effective will they be? 
In the distance in the center of the picture the French see a brigade of the 2nd Netherlands Division guarding the approaches to Quatre Bras. 
The cavalry of the II Corps is not well-positioned.  A brigade of Nassau infantry sits behind the town. 
The overall situation.  Quatre Bras is the town at the crossroads in the deep center of the picture. 
The view from the southeast.  Note the streams and woods making an attack from this direction more easy to defend. 
The Iron Duke is on the hill on the left.  Nassau and Dutch infantry along with two batteries of Dutch artillery are all that stand between Ney and his objective. 
The Prince of Orange is near Quatre Bras. 
A brigade of Dutch cavalry are in the distance, approach Quatre Bras from the northwest.  They are just barely within the command radius of the Prince of Orange. 
Bird's-eye view of the opening moves in the battle.  French are to the top of the picture. 
The dense woods to the west of Quatre Bras.